Overlay
Puts clip overlay on top of clip base using different blend modes, and
with optional x, y positioning, mask operation and opacity.
In some modes the input clips (
base,overlayandmask) are converted to 4:4:4 internally. The output is re-converted to the input colorspace (or to theoutputcolorspace, if specified). But, if possible, original colorspace is preserved during the processing, such as in "blend", "luma" and "chroma" modes; or RGB in "add" and "subtract". Seeuse444, below.Only specific modes like "blend", "luma", "chroma", "add", and "subtract" support 32-bit float input. For these modes, 32-bit float input is natively supported, and the behavior is consistent with other formats, but clamping is not necessarily done.
"add" and "subtract" modes also support conversionless RGB processing without the internal conversion to 4:4:4. This means that for RGB sources, the overlay operation is performed directly in the RGB domain, avoiding unnecessary colorspace conversions.
In general all clips are treated as full-range values. This means that numbers will not be clipped at TV range; you may use Limiter for this task afterwards. If your
maskis TV-range, you should convert it to full-range, or the mask will never be fully opaque. You can use Histogram inHistogram("levels")mode to view the color distributions. If your mask is of limited (TV) range, useConvertBits(fulls=false, fulld=true)orColorYUV(levels="TV->PCto upscale the color levels.It is not recommended to do overlays on interlaced material, unless you know what you are doing.
Syntax and Parameters
Overlay (clip, clip overlay, int "x", int "y", clip "mask", float "opacity",
         string "mode", bool "greymask", string "output",
         bool "ignore_conditional", bool "pc_range", bool "use444",
         string "condvarsuffix", string "placement")
- clip
This clip will be the base, and the overlay picture will be placed on top of this.
- overlay
This is the image that will be placed on top of the base clip. The colorspace or image dimensions do not have to match the base clip.
- x, y
These two variables define the placement of the overlay image on the base clip in pixels. The variable can be positive or negative.
Default: 0, 0
- mask
Optional transparency mask for the overlay image. Must be the same size as the overlay clip. Where mask is darker, overlay will be more transparent.
By default only the greyscale (luma) components are used, but this can be overridden with
greymask``=``false.There is no default, but not specifying is equivalent to supplying a fully 255 (in general
2^bit_depth - 1for 8-16 bit formats or1.0for 32 bit float format) clip. Maximum pixel value means a 1.0 mask multiplier, that means full opacity.
- opacity
This will set how transparent your image will be. The value is from 0.0 to 1.0, where 0.0 is transparent and 1.0 is fully opaque (if no mask is used). When used together with a mask this value is multiplied by the mask value to form the final opacity.
Default: 1.0
- mode
Mode defines how your clip should be overlaid on your image.
Default: "Blend"
Mode |
Description |
|
|---|---|---|
Blend |


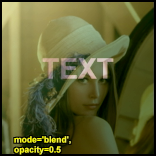
|
This is the default mode. When opacity is 1.0 and there is no mask the overlay image will be copied on top of the original. Ordinary transparent blending is used otherwise. Supports float input and RGB input natively, without conversion to 4:4:4. y |
Add |
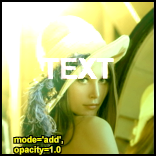
|
This will add the overlay video to the base video, making the video brighter. In YUV, "add" and "subtract" are not just per-channel math. The luma (Y) is added or subtracted (see "Subtract"), but if the result overflows (Y > max) or underflows (Y < 0), the chroma (U/V) is "pulled" toward neutral (gray/white) to mimic how RGB overbright/underbright behaves visually. In RGB, adding two bright colors can result in "white" (all channels maxed). In YUV, if you just add Y, U, and V, we can get weird color shifts. The code compensates by blending U/V toward neutral when Y is out of range, making the result look more like RGB addition. For RGB, a simple per-channel add/subtract (with clamping for 8-16-bit, or no clamping for float) is done. RGB input is processed natively, without conversion to 4:4:4. In 32 bit float with YUV, overshoot (Y > 1.0f) and undershoot (Y < 0.0f) are used and clamping occurs. |
Subtract |
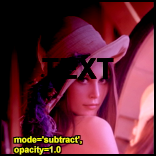
|
The opposite of Add. This will make the areas darker. In YUV, subtracting can cause undershoot (Y < 0.0f), see description at "Add". For RGB, subtraction is performed directly on the channels, without conversion. "subtract" supports float input and RGB input natively, without conversion to 4:4:4. |
Multiply |
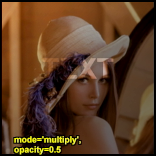
|
This will also darken the image, but it works different than subtract. |
Chroma |
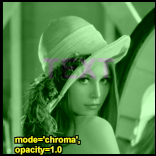
|
This will only overlay the color information of the overlay clip on to the base image. |
Luma |
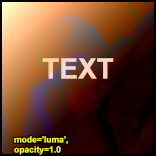
|
This will only overlay the luminosity information of the overlay clip on to the base image. |
Lighten |
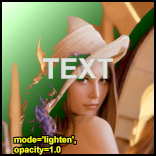
|
This will copy the light infomation from the overlay clip to the base clip, only if the overlay is lighter than the base image. |
Darken |
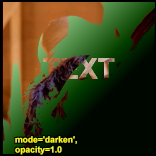
|
This will copy the light infomation from the overlay clip to the base clip, only if the overlay is darker than the base image. |
SoftLight |
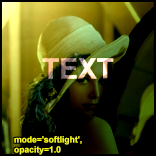
|
This will ligten or darken the base clip, based on the light level
of the overlay clip. If the overlay is darker than luma = 128 [ |
HardLight |
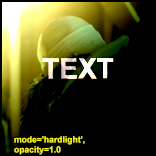
|
This will ligten or darken the base clip, based on the light level of the overlay clip. If the overlay is darker than luma = 128, the base image will be darker. If the overlay is lighter than luma=128, the base image will be lighter. This is useful for adding shadows to an image. Painting with pure black or white results in pure black or white. |
Difference |
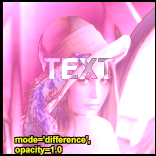
|
This will display the difference between the clip and the overlay. Note that like Subtract a difference of zero is displayed as grey, but with luma=128 instead of 126. If you want the pure difference, use mode="Subtract" or add ColorYUV(off_y=-128). |
Exclusion |
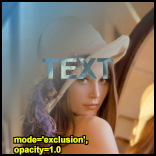
|
This will invert the image based on the luminosity of the overlay image. Blending with white inverts the base color values; blending with black produces no change. |
- greymask
Specifies whether chroma should be used for chroma transparency. Generally you want to leave this alone, this mode shouldn't be disabled. External filters like
mSharpenandMasktoolsare able to export proper chroma maps.Default: true
- output
It is possible to make Overlay return another colorspace. e.g. "YV24", "YUV420P14" or "RGB64"
Default: (input colorspace)
- ignore_conditional
Ignore any given conditional (runtime) variables.
See also: conditional variables section ColorYUV, or ConditionalReader or http://avisynth.nl/index.php/ColorYUV.
Default: false
- pc_range
When set to true, this will make all internal RGB→YUV→RGB conversions assume that YUV sources are full-range instead of the default TV range. It is only recommended to change this setting if you know what you are doing. See RGB considerations below.
Planned on the roadmap: when frame property _ColorRange is supported in Avisynth, Overlay will be able to automatically detect the range of the input clips, and adjust accordingly. Only when pc_range is intentionally given, would it override the automatic detection. But this is not yet implemented.
Default: false
- use444
If set to false, Overlay uses conversionless mode where possible instead of going through YUV 4:4:4. However, for
LumaandChromamodes, RGB must be converted to YUV 4:4:4.Default: (adaptive)
false when mode="blend" and format is RGB
false when mode="blend", "luma" or "chroma" and format is YUV420/YUV422 (YV12/YV16). Original format is kept throughout the whole process, no 4:4:4 conversion occurs.
false when mode="add" or mode="subtract" and format is RGB
true for all other cases (input is converted internally to 4:4:4)
When
use444=false(conversionless mode) is in effect for a subsampled YUV format (4:2:0 or 4:2:2) andgreymask=true(default), the luma-resolution mask is downsampled to chroma resolution on the fly. Theplacementparameter controls the filter weights used for this downsampling.
- condvarsuffix
Allows multiple filter instances to use differently named conditional parameters. Prevents collision and overwrite of variables which are used by different Overlay instances.
See also: conditional variables section ColorYUV, or ConditionalReader, or RGBAdjust.
How does it work: when reading the global variables, the
condvarsuffixparameter is appended to the variable name. E.g. variable name "myvar_a" will be read instead of "myvar" whencondvarsuffix = "_a"is provided.Useful for
ColorYUV,RGBAdjust,Overlaywhen the conditional variables are enabled (or here, in Overlay, is not disabled).In the matching ConditionalReader one have to use the modified name as well:
ConditionalReader("overlay_a_offset.txt", "OL_opacity_offset", false, CondVarSuffix = "_a")
# "_a" is added here by parameter
or specify the suffixed name directly:
ConditionalReader("overlay_a_offset.txt", "OL_opacity_offset_a", false)
# "_a" is added here manually
Default: ""
- placement
Specifies the chroma sample placement for subsampled YUV formats (4:2:0 or 4:2:2). Accepted values (case-insensitive):
"mpeg2","mpeg1", and"top_left".This parameter is only relevant when all three of the following are true:
use444=false(conversionless mode is active for a subsampled format), ANDgreymask=true(default — mask luma plane is used for all chroma planes), ANDthe internal working format is subsampled (YUV 4:2:0 or 4:2:2).
When those conditions hold, the luma-resolution mask is filtered down to chroma resolution once per row (shared for U and V), and the filter weights depend on the declared chroma placement of the source material:
"mpeg2"— chroma samples are co-sited with the left luma column (MPEG-2 / H.264 / H.265 default; left-aligned). This is a 3-tap horizontal triangle filter:(left + 2*centre + right) / 4. For 4:2:0 an additional vertical 2-row sum is folded in:(left + 2*centre + right) / 8(summing both field rows first)."mpeg1"— chroma samples are centred between luma columns (MPEG-1 / JPEG). This is a simple box average:(left + right) / 2. For 4:2:0 a 2×2 box average is used."top_left"— chroma samples are co-sited both horizontally and vertically with the top-left luma sample (HEVC / AV1 / UHD default). This is a point sample:dst = src[x*2], taking only the left-aligned luma sample. For 4:2:0 only the top row is used. This is the fastest option but introduces some aliasing compared to the filtered modes.
When
use444=trueor the source is not subsampled, this parameter has no effect: the mask is already at the chroma plane's full resolution (MASK444 mode is always used internally in those cases).Default:
"mpeg2"
RGB considerations
RGB inputs are accepted. However, Overlay for specific modes may convert the RGB clip
internally to 4:4:4 (see Avisynth+ exceptions), this will lead to an RGB→YUV conversion.
There are two modes for this conversion, toggled by the pc_range parameter. This
parameter will extend the YUV range from 16-235 (8 bit example) (this is the range
used by all Avisynth converters) to 0-255. There are some cases where enabling
pc_range is a good idea:
When overlaying an RGB clip using the
add,subtractormultiplymodes, the range of the overlay clip is better, if it is full range (PC range), since this will enable completely dark areas not to influence the result (instead of adding 16 to every value; since 16 is the "limited" range lowest nominal value).When NOT doing a colorspace conversion on output. If the output colorspace (RGB vs. YUV) is different from the input, the scale will be wrong. If
pc_range=true, and input is RGB, while output is YV16, the YV16 will have an invalid range, and not CCIR-601 range.Planar RGB formats are also supported besides 8 bit packed RGB formats plus RGB48/RGB64.
"blend", "add", and "subtract" modes keep original RGB format, no YUV intermediate conversion is used for RGB input.
Outputting RGB
It might be a good idea to let Overlay output YV24 or YUV444P10-16, even if your
input colorspace is RGB, as this avoids a colorspace conversion back to RGB from
YUV. You should however be aware that your material might be "overscaled", as
mentioned above, if you use pc_range=true. You can correct this by using
ConvertBits(fulls=true, fulld=false) or ColorYUV(levels="pc->tv") to
convert back to 16-235 range (or equivalent ranges to 10+ bits).
Inputting RGB for mask clip
An RGB mask clip may behave a bit oddly if it contains color information.
If you use a greyscale mask, or if you leave greymask=true, you will get
the result you would expect. Note that mask values are never scaled, so it
will automatically be in full-range, directly copied from the RGB values.
Traditionally, the mask is retrieved from channel "B" (Blue).
The maximum mask value is bit depth dependent, 255 for 8 bit, 65535 for 16 bit,
and 1.0 for 32-bit float formats.
Using RGB32, RGB64 or planar RGBA alpha channel
Overlay ignores the alpha (transparency) channel in an RGB32 clip. If you
want the alpha, you can use something like
Overlay(kitten, mask=kitten.ExtractA()) or
Overlay(kitten, mask=kitten.ShowAlpha("RGB32")).
See also Extract filters and ShowAlpha.
Repeated overlays on RGB base clip
For modes, where RGB is not directly supported, when doing repeated partial overlays on an RGB base clip, the unchanged parts of the base clip may undergo a RGB→YV24→RGB conversion for each call to Overlay, producing a progressive loss of color accuracy. In these situations, it is better to convert the base clip to 4:4:4 format (e.g. YV24) before doing the overlays and convert back to RGB afterwards. Remember, that "blend", "add", and "subtract" do not convert from RGB.
Conditional Variables
The global variables OL_opacity_offset, OL_x_offset and
OL_y_offset are read each frame, and applied. It is possible to modify
these variables using FrameEvaluate. The values of these variables
will be added to the original on each frame. So if you specify "x = 100" as a
filter parameter, and the global variable OL_x_offset is set to 50, the
overlay will be placed at x = 150.
If you need to use conditional variables in multiple filters, use
condvarsuffix parameter to make them unique for each filter instance.
In other Overlay filters this can even be disabled by using the
ignore_conditional = true parameter.
There is an example of conditional modification at the ConditionalReader page.
Examples
# Prepares some sources.
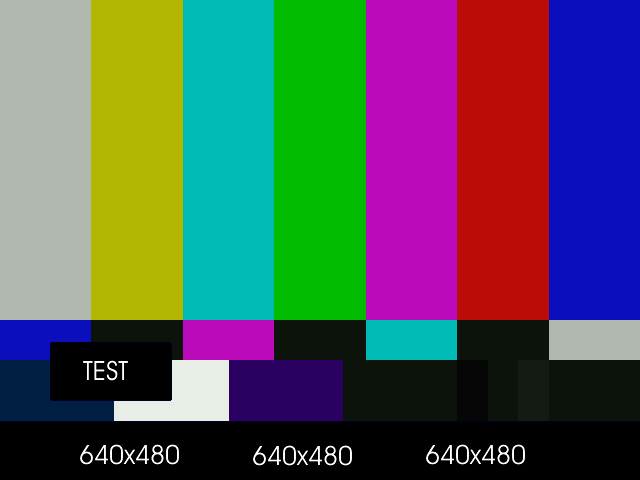
bg = ColorBars(512,384).ConvertToYUY2
text = BlankClip(bg).Subtitle("Colorbars", size=92,
\ text_color=$ffffff).ColorYUV(levels="tv->pc")
# Overlay the text in three different versions.
return Overlay(bg, text, x=50, y=20, mode="subtract", opacity=0.25)
return Overlay(text, x=50, y=120, mode="add", opacity=0.5)
return Overlay(text, x=50, y=240, mode="blend", opacity=0.7)
# Overlay yuy2 clip with rgb clip using a yuy2 mask
# (note that the luma range of the mask is [0-255]).
return Overlay(yuy2clip, rgbclip, mask=rgbclip.ShowAlpha("yuy2"))
# ...which is the same as
mask = rgbclip.ShowAlpha("rgb").ConvertToYUY2
\ .ColorYUV(levels="TV->PC")
return Overlay(yuy2clip, rgbclip, mask=mask)
# ...which is the same as
mask = rgbclip.ShowAlpha("rgb")
return Overlay(yuy2clip, rgbclip, mask=mask)
This will take the average of two clips. It can be used for example to combine two captures of different broadcast captures for reducing noise. A discussion of this idea can be found [here]. A sample script (of course you have to ensure that the frames of the two clips matches exactly, using Trim as needed):
clip1 = AviSource("F:\shakira-underneath_your_clothes1.avi")
clip2 = AviSource("F:\shakira-underneath_your_clothes2.avi")
Overlay(clip1, clip2, mode="blend", opacity=0.5)
Another use is to detect an altered video using Video Error Level Analysis (VELA), where clip2 is clip1 resaved using an h.263 Codec (e.g. XVID). This method is effective when the suspected altered video (clip1) has not been resaved multiple times. Levels is used to exaggerate contrast for view-ability:
clip1 = AviSource("SuspectVideo.avi")
clip2 = AviSource("SuspectVideo_resaved.avi")
result= Overlay(clip1,clip2,mode="Subtract").Levels(0, 5.0, 100, 0, 255)
Use a blue (or any other color) background (blue.jpg is a blue frame overlaid with subtitles in a black rectangle) as mask. The black rectangle containing the subtitles will be visible on the source clip (which is ColorBars here):
testcard = ColorBars()

# get a blue mask clip (the same blue as in ColorBars is used: R16 G16 B180)
maskclip = BlankClip(testcard, color=$0f0fb4)

# Example subtitle file with blue backgroud as above
subs = ImageSource("F:\TestClips\blue.jpg").ConvertToRGB32

maskclip = ColorKeyMask(subs, $0f0fb4, 60)

Overlay(testcard, subs, mask=ShowAlpha(maskclip), mode="blend", opacity=1)

A tolerance of 60 is used here because the blue is not entirely uniform. Near the black rectangles the blue is given by R23 G22 B124. Probably due to the compression of blue.jpg.
Move a red (or any other color) dot on a clip using
ConditionalReader(dot.bmp is a red dot on a black background):
a1 = ColorBars().Trim(0,399)
a2 = ImageSource("F:\TestClips\dot.bmp").ConvertToRGB32

# a2.GreyScale returns a grey dot on a black background; Levels makes the dot white
mask_clip = Mask(a2, a2.GreyScale.Levels(0, 1, 75, 0, 255))
Overlay(a1, a2, mask=ShowAlpha(mask_clip), y=0, x=0, mode="blend", opacity=1)

ConditionalReader("xoffset.txt", "ol_x_offset", false)
ConditionalReader("yoffset.txt", "ol_y_offset", false)
Make xoffset.txt containing the x-positions and yoffset.txt containing the y-positions of the moving dot (see ConditionalReader for more info), and put it in the same folder as your script:
xoffset.txt

Type int
Default -50

R 0 100 20
I 100 200 20 250
R 200 300 250
I 300 400 250 400 ::yoffset.txt

Type int
Default -50

R 0 100 20
I 100 200 20 350
R 200 300 350
I 300 400 350 40
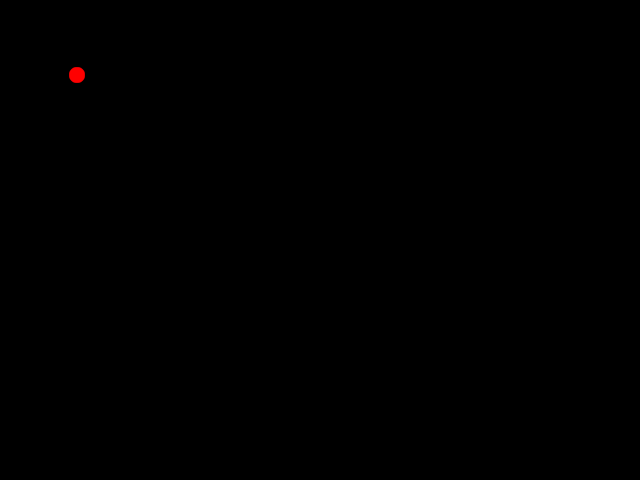
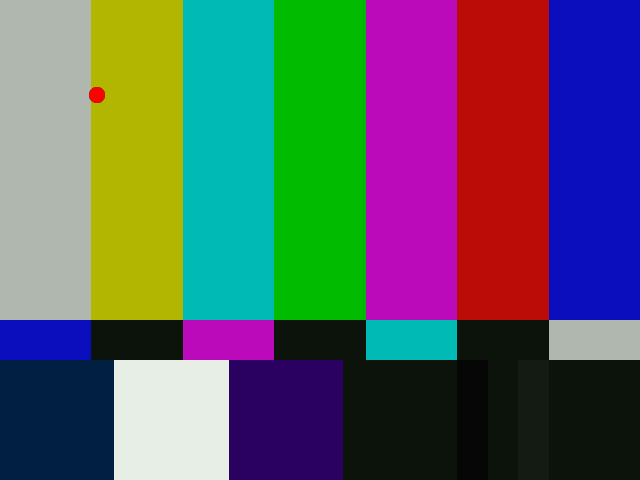
thus the dot moves in the following way: (20,20) -> (250,350) -> (400,40). Nb, it's also possible to do this with Animate.
And the same with using condvarsuffix:
a1 = ColorBars().Trim(0,399)
a2 = ImageSource("F:\TestClips\dot.bmp").ConvertToRGB32

# a2.GreyScale returns a grey dot on a black background; Levels makes the dot white
mask_clip = Mask(a2, a2.GreyScale.Levels(0, 1, 75, 0, 255))
Overlay(a1, a2, mask=ShowAlpha(mask_clip), y=0, x=0, mode="blend", opacity=1, \
        condvarsuffix="_a")

# directly read the _a prefixed variable
ConditionalReader("xoffset.txt", "ol_x_offset_a", false)
# or _a as exactly named parameter
ConditionalReader("yoffset.txt", "ol_y_offset", false, condvarsuffix="a")
Test script for different bit depths with and without masks
# Prepares some sources.
bg = ColorBars(512,384).ConvertToYV16() # or ConvertToYUV444()
text = BlankClip(bg).Subtitle("Colorbars", size=92,
\          text_color=$ffffff).ColorYUV(levels="tv->pc").ConvertToYV16()
mask = BlankClip(bg).Subtitle("I am the Mask", size=62,
\          text_color=$ffffff).ColorYUV(levels="tv->pc")

# use these two lines for RGB tests instead of YUV
bg = bg.ConvertToRGB32().ConvertToPlanarRGB()
text = text.ConvertToRGB32().ConvertToPlanarRGB()

mask = mask.GreyScale().ConvertToYV16()

# tests for 8-10-16-32 bits

#add no mask
ov8 = Overlay(bg,text, x=50, y=120, mode="subtract", opacity=0.5).Info()
ov10 = Overlay(bg.ConvertBits(10),text.ConvertBits(10), x=50, y=120, mode="subtract", opacity=0.5).Info().ConvertBits(8)
ov16 = Overlay(bg.ConvertBits(16),text.ConvertBits(16), x=50, y=120, mode="subtract", opacity=0.5).Info().ConvertBits(8)
ov32 = Overlay(bg.ConvertBits(32),text.ConvertBits(32), x=50, y=120, mode="subtract", opacity=0.5).Info().ConvertBits(8)

#add with mask
ov8m = Overlay(bg,text, x=50, y=120, mode="subtract", opacity=0.5, mask=mask).Info()
ov10m = Overlay(bg.ConvertBits(10),text.ConvertBits(10), x=50, y=120, mode="subtract", opacity=0.5, mask=mask.ConvertBits(10)).Info().ConvertBits(8)
ov16m = Overlay(bg.ConvertBits(16),text.ConvertBits(16), x=50, y=120, mode="subtract", opacity=0.5, mask=mask.ConvertBits(16)).Info().ConvertBits(8)
ov32m = Overlay(bg.ConvertBits(32),text.ConvertBits(32), x=50, y=120, mode="subtract", opacity=0.5, mask=mask.ConvertBits(32)).Info().ConvertBits(8)
/*
opacity 1.0
#add no mask
ov8 = Overlay(bg,text, x=50, y=120, mode="subtract", opacity=1.0).Info()
ov10 = Overlay(bg.ConvertBits(10),text.ConvertBits(10), x=50, y=120, mode="subtract", opacity=1.0).Info().ConvertBits(8)
ov16 = Overlay(bg.ConvertBits(16),text.ConvertBits(16), x=50, y=120, mode="subtract", opacity=1.0).Info().ConvertBits(8)
ov32 = Overlay(bg.ConvertBits(32),text.ConvertBits(32), x=50, y=120, mode="subtract", opacity=1.0).Info().ConvertBits(8)

#add with mask
ov8m = Overlay(bg,text, x=50, y=120, mode="subtract", opacity=0.5, mask=mask).Info()
ov10m = Overlay(bg.ConvertBits(10),text.ConvertBits(10), x=50, y=120, mode="subtract", opacity=1.0, mask=mask.ConvertBits(10)).Info().ConvertBits(8)
ov16m = Overlay(bg.ConvertBits(16),text.ConvertBits(16), x=50, y=120, mode="subtract", opacity=1.0, mask=mask.ConvertBits(16)).Info().ConvertBits(8)
ov32m = Overlay(bg.ConvertBits(32),text.ConvertBits(32), x=50, y=120, mode="subtract", opacity=1.0, mask=mask.ConvertBits(32)).Info().ConvertBits(8)
*/

return StackHorizontal(\
Stackvertical(ov8,ov10,ov16,ov32),\
Stackvertical(ov8m,ov10m,ov16m,ov32m)\
).ConvertToRGB32()
Changelog |
|
|---|---|
3.7.6 |
"add", and "subtract" supports 32-bit float input.
"add" and "subtract" support RGB input without 4:4:4 conversion.
Check for unsupported 32-bit float, such modes give error.
Add
placement parameter ("mpeg2" default, "mpeg1", or
"top_left").Relevant for conversionless mode (
use444=false) with subsampled
YUV and greymask. |
3.7.2 |
Address issue #255: "blend": now using accurate formula using float calculation internally. |
3.7.1 |
Overlay mode "multiply": overlay clip is not converted to 4:4:4 when when 420 or 422, since only Y is used from it (speed). |
3.7.0 |
allow 4:1:1 input
fix crash when mask is YUV411 and greymask=false
|
3.4.0 |
Add "condvarsuffix" parameter |
r2502 |
Correct masked blend: keep exact clip1 or clip2 pixel values for mask extremes 255 or 0. Previously 0 became 1 for zero mask, similarly 255 changed into 254 for full transparency (255) mask |
r2420 |
"Blend" native greyscale mode: process y plane only w/o conversion
automatic use444=false for "blend"/"luma"/"chroma"
for inputs: 420/422/444 and any RGB, lossless Planar RGB intermediate
for PackedRGB.
mask auto-follows input clip format. For compatibility: when
greymask=true (default) and mask is RGB then mask source is
the B channel 254 for full transparency (255) mask
|
r2359 |
new parameter: bool use444 (default true for compatibility)
lossless RGB "blend" w/o YUV conversion
|
v2.54 |
Initial Release |
$Date: 2026/04/22 11:12:00 $
