Tweak
Adjust hue, saturation, brightness, and contrast of a video clip.
Both the saturation and hue can be adjusted for range of saturation from
minSat to maxSat and a range of hue from startHue to endHue.
All parameters are autoscaling – they work without changes at all bit depths.
Syntax and Parameters
Tweak (clip,
       float "hue", float "sat", float "bright", float "cont",
       bool "coring", bool "sse", float "startHue", float "endHue",
       float "maxSat", float "minSat", float "interp", bool "dither",
       bool "realcalc", float "dither_strength")
- clip
Source clip; all YUV(A) color formats supported.
- hue = 0.0
Adjust the color hue of the image.
hue>0.0 shifts the image towards red.hue<0.0 shifts the image towards green.
Range: -180.0 to +180.0Default: 0.0
- sat
Adjust the color saturation of the image by controlling gain of the color channels.
sat>1.0 increases the saturation.sat<1.0 reduces the saturation.sat=0converts to Greyscale.
Range: 0.0 to 10.0Default: 1.0
- bright
Change the brightness of the image by applying a constant bias to the luma channel.
bright>0.0 increases the brightness.bright<0.0 decreases the brightness.
Range: -255.0 to 255.0Default: 0.0
- cont
Change the contrast of the image by multiplying the luma values by a constant.
cont>1.0 increase the contrast (the luma range will be stretched).cont<1.0 decrease the contrast (the luma range will be contracted).
Range: 0.0 to 10.0Default: 1.0
- coring
- When set to true, the luma (Y) and chroma are clipped to limited range (TV);When set to false, the luma and chroma are unconstrained.
Default: true
- sse = false
- Only available for YUY2 with
coring=falseand with the defaulthue,sat,brightandcontoptions.Ifsse=true, it re-enables the SSE code if required.Default: false
- startHue, endHue
The hue and saturation will be adjusted for image values in the range [
startHue,endHue] whenstartHue<endHue. Note that the hue is periodic, thus a hue of 360 degrees corresponds with a hue of zero degrees.Range: 0 to 360 (given in degrees)Default: 0, 360 (all hues)The following shows some arbitrary
startHueandendHuevalues for the basic colors, with a Histogram Vectorscope to illustrate the color circle: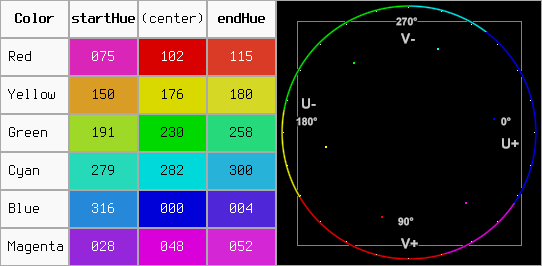
If
endHue<startHuethen the range [endHue, 360] and [0,startHue] will be selected (thus anti-clockwise). If you need to select a range of [350, 370] for example, you need to specifystartHue=350andendHue=10, (370-360). Thus when using the default values, all pixels will be processed.
- maxSat, minSat
The hue and saturation will be adjusted for image values in the range [
minSat,maxSat].Practically speaking, the percentage saturation of a pixel will be in the range [0, 100], since these correspond to valid RGB pixels (100% corresponds to R=255, G=B=0, which has a saturation of 119 in units of chroma). An overshoot (up to 150%) is allowed for non-valid RGB pixels (150% corresponds to U=V=255, which has a saturation of √(1272+1272) = 180). Thus when using the default values all pixels will be processed.
Range: 0 to 150;minSatmust be less thanmaxSat.Default: 150, 0
- interp
Interpolate the saturation adjustment at the edges of the chosen range to prevent banding.
The adjustment is interpolated between 1.0 and sat in the range [minS-
interp, minS] and between sat and 1.0 in [maxS, maxS+interp], where minS and maxS are the equivalents ofminSatandmaxSatin chroma units (100% = 119 units). There is no interpolation forinterp=0, which can be useful when a clip consists of uniform colors and you want a hard cutoff. The interpolation is linear.Range: 0 to 32; given in units of chroma, rather than a percentage.Default: 16.0
- dither
When true, ordered dithering is applied when doing the adjustment.
Default: false
- realcalc
By default, Tweak uses a LUT for the luma channel when the bit depth is 8 to 16 bits and uses realtime calculation for 32-bit float. For the chroma channels, a LUT is used only for 8 or 10 bits, greater than 10 and the calculation for each pixel is done in realtime. When
realcalc=true, it overrides using a LUT and calculates each pixel on-the-fly.Default: false
- dither_strength
Control the dithering amount. For example,
dither_strength=1.0adds a ±0.5 amplitude dither for all bit depths. As the bit depth increases the less noticiable the dithering strength is. To get the same visual output as in 8-bit anddither_strength=1.0, the strength needs to be set to 4 for 10-bit, 16 for 12-bit, 64 for 14-bit and 256 for 16-bit.Default: 1.0
Examples
Adjusting contrast and brightness
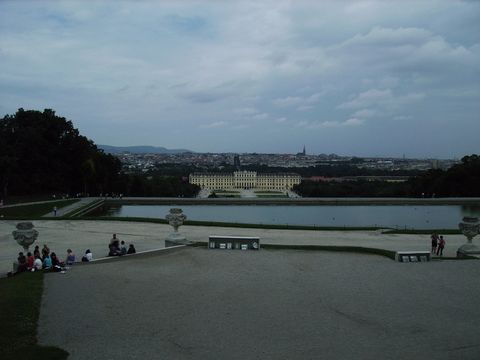
Original¶ |
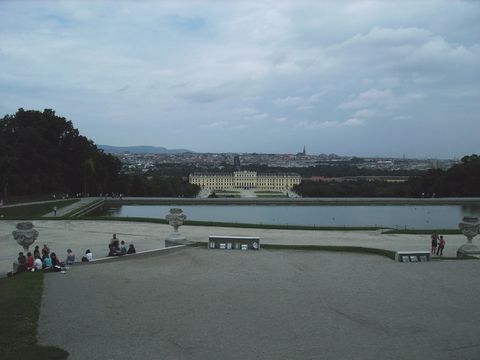
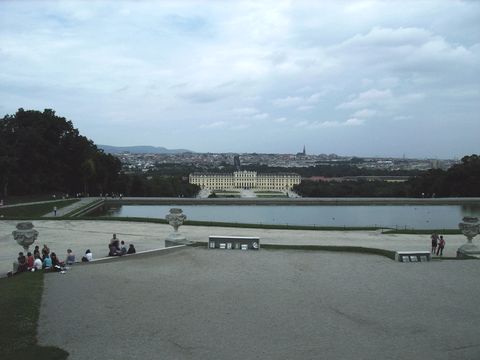
There are two problems with this picture. It is too dark, and the contrast is too small (the details of the tree are not visible for example). First, we will increase the brightness to make the picture less dark (left picture below). Second, we will increase the contrast to make details in the dark areas more visible (right picture below). Make sure that the bright parts does not get too bright though.
|
|
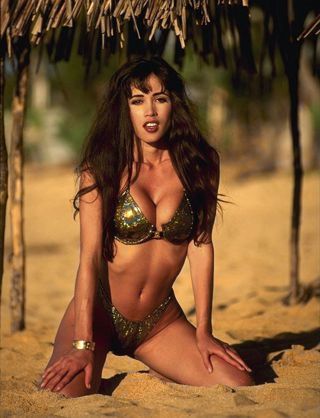
Adjusting saturation
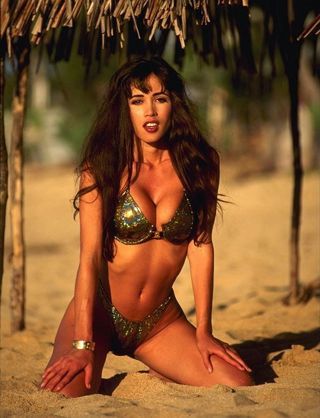
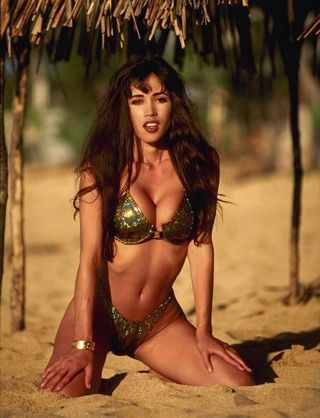
Original¶ |

|
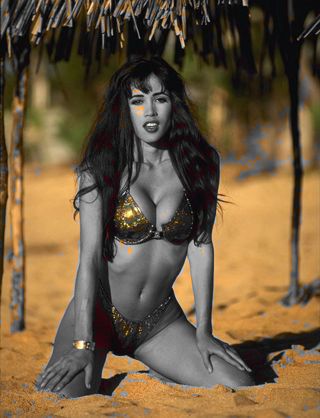
Suppose we want to lower the saturation of the skin of the girl, and the
background should be left intact. The proper way to do this is to set sat=0,
and lower the hue range till you found the correct hue range which should be
processed. This can be done by using a Vectorscope, but also manually. (If it
is needed the saturation range can also be specified if the dark and white
parts of that hue should not be processed.) The result is below.
|
|
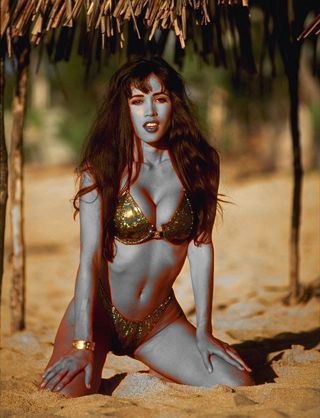
Instead, we can also try to "select" the skin of the girl by narrowing the saturation range only. The result is below. In this case the result is pretty much identical.
|
|
YUV to YIQ conversion
The NTSC analog television system used the YUV color space with the UV axes exchanged and rotated by minus 33 degrees. See Colour FAQ of Charles Poynton. Note he gives the reverse transformation (from YIQ to YUV).
With its axes rotated by 33 degrees, a color space called YIQ. In YIQ, orange and teal are along the in-phase (I) axis, while green and magenta are along the quadrature (Q) axis. The eye is far more sensitive to detail along the I axis than along the Q axis, and NTSC allocated more bandwidth for I than for Q.
The Tweak filter can be used to convert YUV to YIQ, where the U axis represents I and V represents Q. The following example, based on an example at Swap, converts a YUV clip to YIQ, blanks the Q channel, and converts back to YUV. This produces the "orange and teal" color scheme that became a cliché.
Function YUVtoYIQ(clip clip)
{
   YtoUV(clip.VtoY(), clip.UtoY(), clip) # swap U and V
   Tweak(hue=-33)
   # Now: U corresponds to I, V corresponds to Q
   # could also have used: FlipHorizontal(clip).Tweak(hue=57)
}

Function YIQtoYUV(clip clip)
{
   clip.Tweak(hue=33)
   YtoUV(VtoY(), UtoY(), last) # swap U and V
}

clip = AviSource(...)
yiqclip = YUVtoYIQ(clip)  # convert to YIQ
v_chroma = BlankClip(VToY(yiqclip), color=$808080)
YToUV(yiqclip.UToY, v_chroma, yiqclip)
YIQtoYUV()  # convert back to YUV
AudioDub(yiqclip)
This allows processing the I and Q signals separately. See the VideoHelp thread for more info.
Developer notes
hue = 180/π * atan2((V-128)/128, (U-128)/128)
sat = √((U-128)2 + (V-128)2)
Changelog
Version |
Changes |
|---|---|
AviSynth r2487 |
Added Luma LUT for 10-16 bits, Chroma LUT for 10 bit
(old: LUT 8 bit only).
Added
dither_strength parameter. |
AviSynth r2290 |
Added support for 16/32 bits, without lookup tables.
Added
realcalc parameter. |
AviSynth 2.6.0 |
Added |
AviSynth 2.5.8 |
Added parameters |
AviSynth 2.5.6 |
Added |
AviSynth 2.5.3 |
Added |
$Date: 2022/09/17 15:28:44 $
